Are you looking for a luxurious way to pamper your skin without breaking the bank? An emulsified sugar scrub might be just what you need. But what exactly is an emulsified sugar scrub, and how can you make one at home?
An emulsified sugar scrub is a homemade skincare product that combines sugar, oils, and an emulsifying agent to create a smooth, creamy exfoliant that rinses off easily and leaves your skin feeling soft and moisturized.
In this comprehensive guide, we’ll explore everything you need to know about emulsified sugar scrubs. We’ll cover the basics, provide a step-by-step recipe, share tips for customization, and address common questions and concerns. By the end, you’ll be equipped to create your own spa-quality skincare product right in your kitchen.
What Is an Emulsified Sugar Scrub?
An emulsified sugar scrub is a step up from traditional sugar scrubs. While both types use sugar as an exfoliant, emulsified scrubs have a key difference that sets them apart.
In a regular sugar scrub, oil and sugar are simply mixed together. This can lead to separation and a greasy feeling on the skin. An emulsified sugar scrub, on the other hand, includes an emulsifying agent. This ingredient allows the oil and water to mix, creating a creamy, lotion-like texture that rinses off cleanly.
The benefits of using an emulsified sugar scrub include:
- Easier application
- More even distribution of ingredients
- Less mess in the shower
- Better moisturizing properties
- A luxurious, spa-like experience
Ingredients for Making Emulsified Sugar Scrubs
To create your own emulsified sugar scrub, you’ll need a few key ingredients. Let’s break them down into base ingredients and optional additives.

Base Ingredients
- Sugar: The main exfoliating agent in your scrub. You can use white, brown, or raw sugar, depending on your preference. Finer sugars provide gentler exfoliation, while coarser sugars offer a more intense scrub.
- Emulsifying agent: This is what sets emulsified scrubs apart. Common options include:
- Emulsifying wax (e-wax)
- Polysorbate 80
- BTMS-50 (Behentrimonium Methosulfate)
- Oils: These provide moisturizing benefits. Popular choices include:
- Coconut oil
- Sweet almond oil
- Jojoba oil
- Grapeseed oil
- Butters: These add richness and moisture. Options include:
- Shea butter
- Cocoa butter
- Mango butter
Optional Additives
- Essential oils: For natural fragrance and potential aromatherapy benefits.
- Natural colorants: To make your scrub visually appealing. Examples include:
- Mica powders
- Beetroot powder
- Spirulina powder
- Preservatives: To extend the shelf life of your scrub, especially if it might come into contact with water.
- Vitamins: Such as Vitamin E oil, which acts as an antioxidant.
Step-by-Step Emulsified Sugar Scrub Recipe
Now that we understand the components, let’s dive into making an emulsified sugar scrub. This basic recipe can be customized to suit your preferences.

Basic Emulsified Sugar Scrub Recipe
Ingredients:
- 1 cup (200g) granulated sugar
- 1/4 cup (50g) emulsifying wax
- 1/4 cup (50g) coconut oil
- 1/4 cup (50g) sweet almond oil
- 1 tsp vitamin E oil (optional, as a natural preservative)
- 20-30 drops essential oil of your choice (optional)
Instructions:
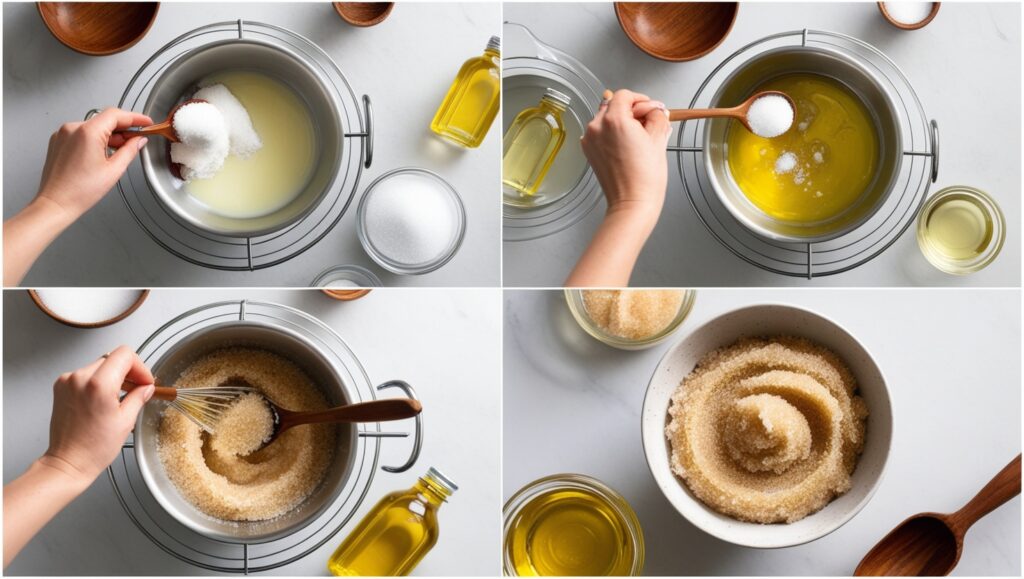
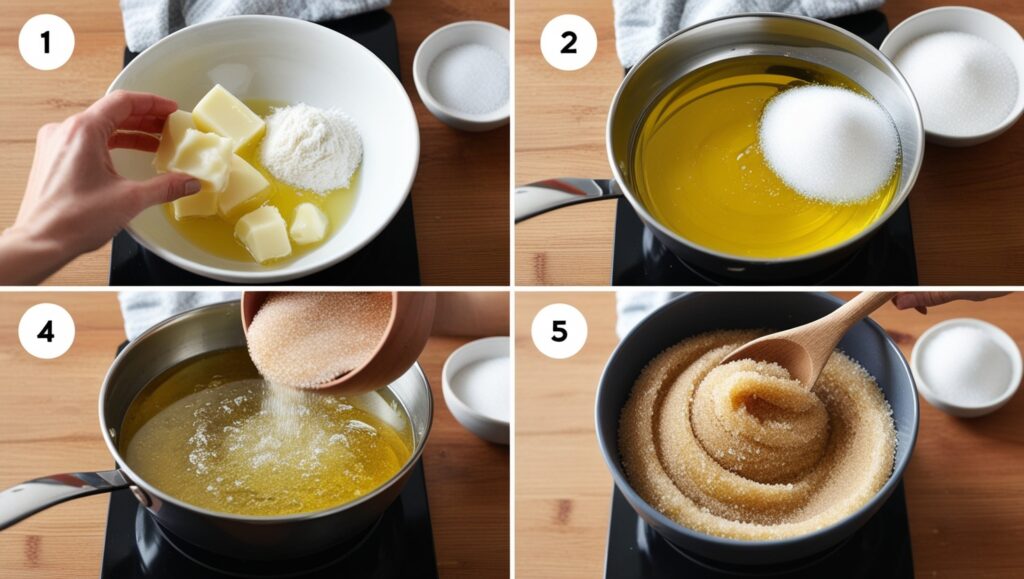
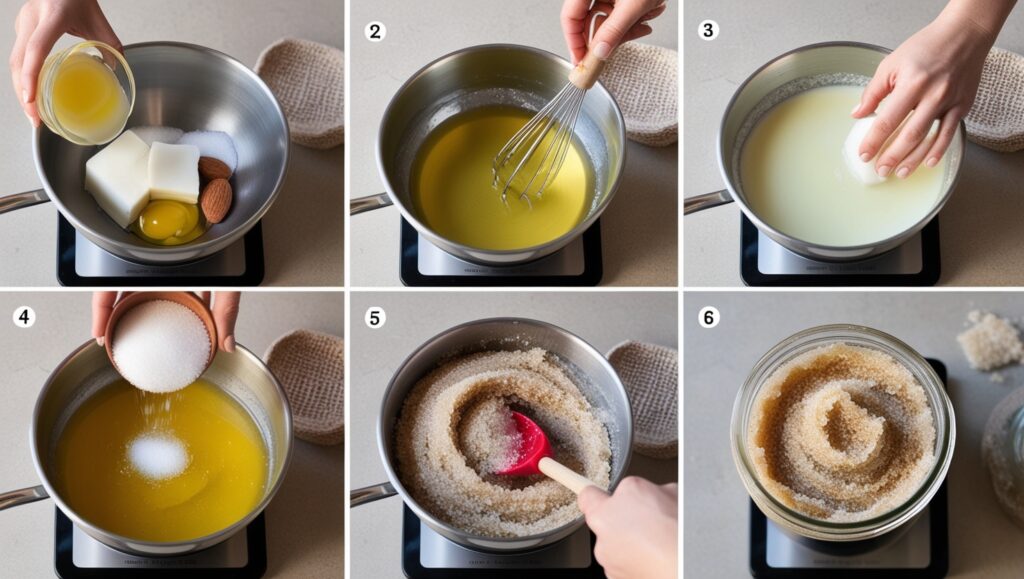
- In a heat-safe bowl, combine the emulsifying wax, coconut oil, and sweet almond oil.
- Create a double boiler by placing the bowl over a pot of simmering water. Heat the mixture, stirring occasionally, until the wax and coconut oil have completely melted and combined with the almond oil.
- Remove the bowl from heat and let it cool for a few minutes. The mixture should start to thicken slightly but remain liquid.
- Add the sugar to the oil mixture and stir well to combine. The sugar should be evenly distributed throughout the oils.
- If using, add the vitamin E oil and essential oils. Stir to incorporate.
- Allow the mixture to cool completely. As it cools, it will thicken into a creamy, spreadable consistency.
- Once cooled, transfer your emulsified sugar scrub to a clean, airtight container.
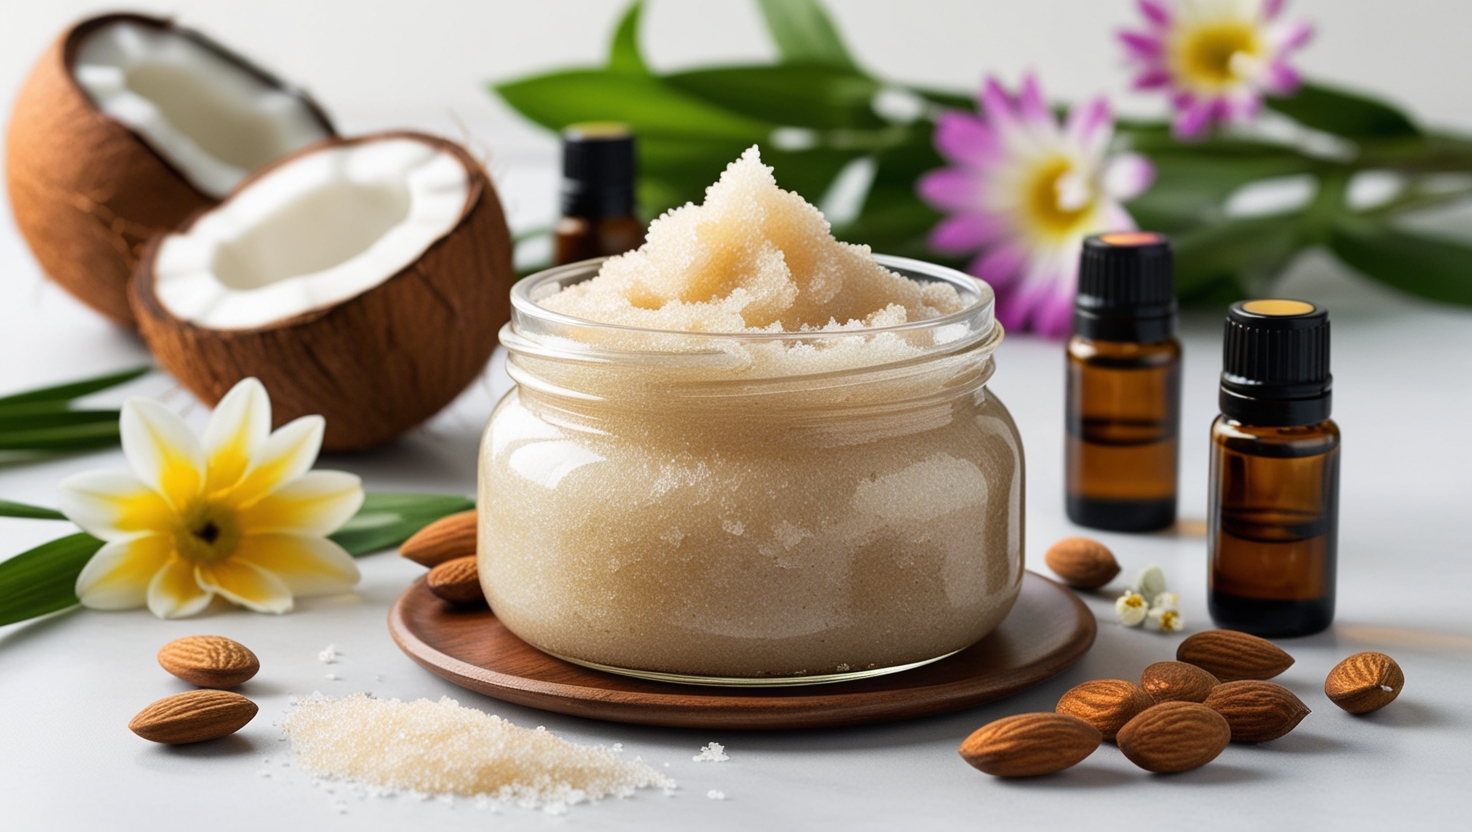
Your homemade emulsified sugar scrub is now ready to use! For best results, store it in a cool, dry place and use within 3-6 months.
Customizing Your Sugar Scrub
One of the joys of making your own skincare products is the ability to customize them to your liking. Here are some ways to make your emulsified sugar scrub uniquely yours:
- Adjust the sugar-to-oil ratio: For a more intense scrub, increase the amount of sugar. For a gentler exfoliation, use less sugar or choose a finer grain.
- Experiment with fragrances: Mix and match essential oils to create your signature scent. Lavender and vanilla make a calming combination, while citrus oils can create an energizing blend.
- Add natural colorants: A pinch of mica powder or a natural colorant can transform your scrub into a visually appealing product. Just remember that a little goes a long way.
- Incorporate skin-loving extras: Consider adding a teaspoon of honey for its humectant properties, or some finely ground oatmeal for extra soothing effects.

Tips for Perfect Emulsified Sugar Scrubs
To ensure your homemade scrubs turn out perfectly every time, keep these tips in mind:
- Achieve the right consistency: The ideal texture is similar to a thick, creamy frosting. If your scrub is too thin, add more sugar. If it’s too thick, add a bit more oil.
- Prevent separation: Make sure to use the correct ratio of emulsifying wax to oils. Generally, you’ll want to use about 25% of the total oil weight in emulsifying wax.
- Extend shelf life: While sugar is a natural preservative, adding a few drops of grapefruit seed extract or using a broad-spectrum preservative can help your scrub last longer, especially if it might come into contact with water.
- Mix thoroughly: Ensure all ingredients are well combined to prevent any pockets of unmixed sugar or oil.
Safety Considerations

While making and using homemade skincare products can be rewarding, it’s important to keep safety in mind:
- Sanitization: Always use clean utensils and containers to prevent contamination.
- Patch testing: Before using your scrub all over, do a patch test on a small area of skin to check for any adverse reactions, especially if you’ve included new ingredients or essential oils.
- Proper storage: Keep your scrub in a sealed container away from moisture to prevent mold growth. If you notice any changes in color, smell, or texture, it’s best to discard the product.
- Water activity: If your scrub might come into contact with water during use, consider using a preservative to prevent bacterial growth.
Using Your Emulsified Sugar Scrub
To get the most out of your homemade emulsified sugar scrub, follow these guidelines:
- Frequency: Use your scrub 1-2 times a week for normal skin, or less frequently if you have sensitive skin.
- Application: In the shower or bath, apply the scrub to damp skin using gentle circular motions. Focus on areas that tend to be dry or rough, like elbows, knees, and feet.
- Rinsing: Rinse thoroughly with warm water. The emulsified nature of the scrub should allow it to rinse off easily without leaving an oily residue.
- Aftercare: Pat your skin dry and follow up with a moisturizer if needed, although you may find your skin feels sufficiently hydrated from the oils in the scrub.
Troubleshooting Common Issues
Even with the best recipes and techniques, you might encounter some issues. Here’s how to address common problems:
- Scrub is too hard: If your scrub has solidified too much, gently warm it and add a bit more liquid oil.
- Scrub is too soft: Add more sugar or allow it to cool completely. Some scrubs may take 24-48 hours to reach their final consistency.
- Separation occurs: This usually means there wasn’t enough emulsifying agent. Try reheating the mixture and adding a bit more emulsifying wax.
- Graininess: If your scrub feels grainy rather than smooth, try using a different type of emulsifying wax or melting your ingredients at a lower temperature.
Variations of Emulsified Sugar Scrub Recipes
Once you’ve mastered the basic recipe, try these variations to expand your homemade skincare repertoire:
Citrus Burst Scrub
Add 15 drops each of sweet orange and lemon essential oils, plus 1 tablespoon of lemon zest for an invigorating, brightening scrub.
Lavender Dream Scrub
Use 20 drops of lavender essential oil and 1 tablespoon of dried lavender buds for a calming, sleep-promoting scrub.
Coffee Energizer Scrub
Replace half the sugar with finely ground coffee and add 10 drops of peppermint essential oil for an energizing, cellulite-fighting scrub.
Comparing Homemade vs. Store-Bought Scrubs
While store-bought scrubs offer convenience, making your own emulsified sugar scrubs has several advantages:
- Cost-effective: Homemade scrubs are often more economical, especially when made in larger batches.
- Ingredient control: You have full control over what goes into your scrub, allowing you to avoid potential allergens or irritants.
- Customization: Tailor your scrub to your exact preferences in terms of scent, texture, and benefits.
- Freshness: Homemade scrubs don’t sit on shelves for months before use, ensuring maximum freshness and efficacy.
Eco-Friendly Packaging Ideas
To make your homemade skincare routine more sustainable, consider these packaging options:
- Glass jars: Reusable and recyclable, glass jars are an excellent choice for storing your scrubs.
- Bamboo containers: These biodegradable containers offer a natural look and feel.
- Upcycled containers: Clean and repurpose jars from other products to reduce waste.
- Biodegradable packaging: If gifting, look for eco-friendly wrapping options like kraft paper or reusable fabric wraps.
Gifting Your Homemade Emulsified Sugar Scrubs
Homemade skincare products make thoughtful, personal gifts. Here are some ideas to make your gift extra special:
- Create custom labels with the ingredients and usage instructions.
- Package your scrub in a beautiful jar tied with a ribbon or twine.
- Include a small wooden or bamboo spoon for application.
- Create a spa gift basket by pairing your scrub with other homemade products like bath salts or body butter.
Frequently Asked Questions
To wrap up our guide, let’s address some common questions about emulsified sugar scrubs:
- How long do homemade sugar scrubs last?
With proper storage and the use of preservatives, your scrub can last 3-6 months. - Can I use any type of sugar?
Yes, but different sugars will provide different levels of exfoliation. Experiment to find what works best for your skin. - Are emulsified sugar scrubs suitable for all skin types?
Generally yes, but those with very sensitive skin should do a patch test first and may prefer a gentler exfoliant. - How do I know if my scrub has gone bad?
If you notice changes in color, smell, or texture, or see any signs of mold, it’s time to discard the scrub. - Can I sell my homemade emulsified sugar scrubs?
If you’re considering selling your scrubs, research local regulations regarding homemade cosmetics and consider getting your products professionally tested for safety.
Creating your own emulsified sugar scrub is a rewarding way to care for your skin while controlling exactly what goes into your skincare products. With this guide, you’re now equipped to create luxurious, effective scrubs tailored to your preferences. Happy scrubbing!


Utterly composed content material, thanks for entropy.